Posted by Ellen Lloyd Adams & Dan Adams on February 28, 2019 at 9:00 AM • 0 comments
HELPFUL VIDEOS FOR STARTING AND CARING FOR YOUR TOPIARY
By Ellen Adams
Here are links to some videos to assist you in sucessfully starting and caring for your topiary. We hope you find them helpful. Please feel free to contact us with any additional questions you may have:
Posted by Ellen Lloyd on December 19, 2013 at 4:55 PM • 0 comments
How to make a succulent sphere - hope for Your Garden from Los Osos Valley Nursery
By Ellen Lloyd
19
December
2013
Do It Yourself succulent & bromeliad hanging ball from a Braun mossed sphere. Add that unique flair to your topiary collection with a touch of creativity. We have the best selection of Animal Topiary, Topiary Forms, Topiary Frames, Topiary Garden, Garden Art, and Garden Sculpture to choose from. View our product selection or browse our site at www.topiary4u.com to get a quote for a custom topiary idea!
Posted by Ellen Lloyd on July 31, 2013 at 11:09 AM • 0 comments
Great custom topiary ideas
By Ellen Lloyd
31
July
2013
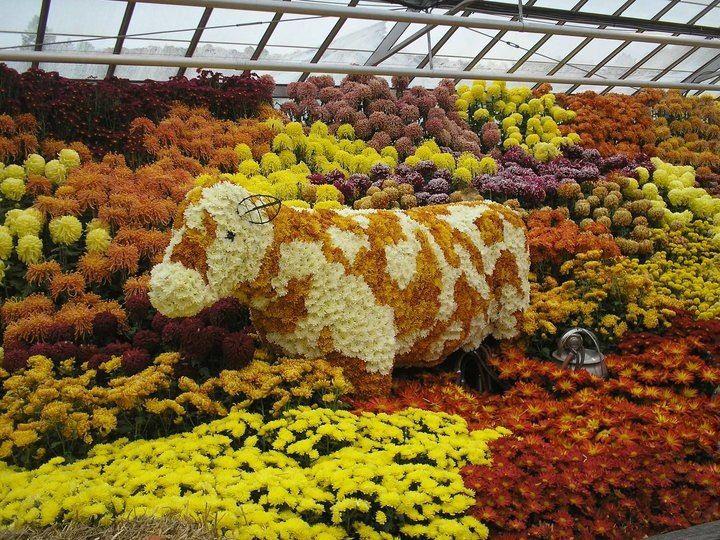
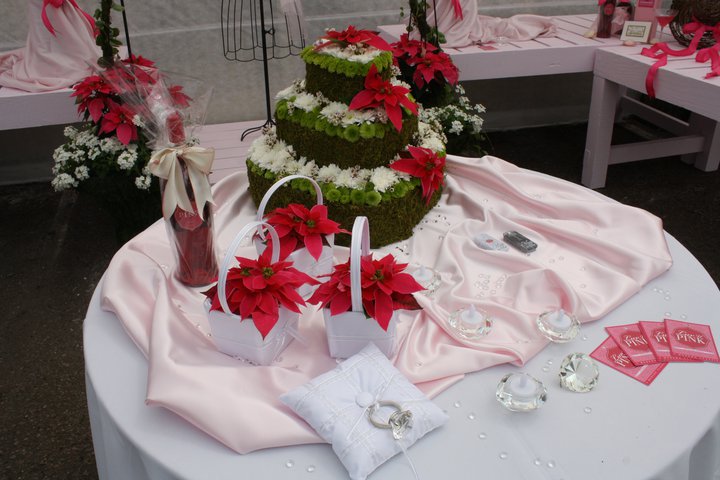
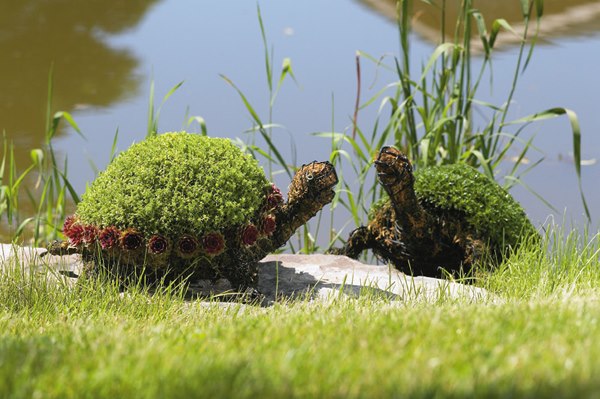
Don’t know where to start when deciding which topiary to add to your collection. We have the best selection of Animal Topiary, Topiary Forms, Topiary Frames, Topiary Garden, Garden Art, and Garden Sculpture to choose from. Steer your guests’ curiosity to your collection. We can help you dazzle the next wedding with a fabulous topiary cake theme idea, or enhance the greenhouse with a mossed 60” cow, or enchant your pond with beautiful topiary turtles. View our product selection or browse our site at www.topiary4u.com to get a quote for a custom topiary idea!
Posted by Ellen Lloyd on June 24, 2013 at 9:54 PM • 0 comments
DIY Moss Topiary
By Ellen Lloyd
24
June
2013
Whether you want to start with a DIY or grow your own animal topiary using a topiary frame, topiary form; there are a few things to consider. First, decide if you are going to start with a garden sculpture or use a garden art idea. We have many to choose from beginning on our homepage. Your topiary garden will thank you and will serve many years of aesthetically pleasing service. For now, we’ll show you how to implement your very own Do-It-Yourself moss topiary! Follow the links to acquire the materials needed. Note: Some materials not available through us are linked outside of www.topiary4u.com
Place a chunk of sheet moss on the ball. Holding onto the moss, use your thumb to hold the end of the embroidery thread onto the middle of the moss. Wrap the thread around the ball repeatedly, varying the direction of your wrap to hold the moss in place and flatten out major lumps. Repeat the process several times until the whole ball is covered and fairly uniform in shape. Use your fingers or a needle to run the thread under existing wraps and tie it off.
Trim foam square to fit inside your pot. Place the square in the bottom of the pot and fill in empty space with newspaper (I used torn up brown paper bags). Cut twig to desired height with a garden shears. Push one end into the moss ball and the other end into the foam square in the pot and straighten. Add more paper to support the twig and add volume if needed.
Trim burlap into a square and wrap around pot, folding fabric over itself to create a tight wrap. Secure with ribbon and trim excess burlap at the top to desired height.
If you have extra moss or don’t feel like dealing with the burlap, here are two other options that could substitute for or complement your topiaries around your house! Swapping decorative elements in a simple hurricane vase is a cheap and easy way to change up your seasonal decor.
Posted by Ellen Lloyd on April 7, 2013 at 12:55 PM • 0 comments
Topiary Planting Techniques
By Ellen Lloyd
07
April
2013
What you are going to typically find at your local garden center are 4" or 6" potted plants that you would normally stick into the ground for planting. For topiary planting we are going to do something a little different. And this is where the fun starts! Please continue reading to discover helpful ways to get your garden spruced up rather quickly.
First, choose your plants carefully. We always try to use low growing ground cover type plants for our topiary as they will show off the form the best.
Second, take you potted plant, remove it from the pot and using a fairly sharp (aka be careful) knife we are going to cut the plant into sections. One inch square sections will work great but cut how you fell comfortable. Then gently remove some of the soil from the roots.
Third, using your finger or small stick make a small hole in the moss where you want your plant to go. Then guide the roots into the hole and press the moss firmly around the roots. You will find that if the moss is wet this step is much easier.
Fourth, set in a shady area and if possible apply some starter fertilizer and let the plant get established before you set out into your garden.
Please watch the video which will inform you about simple planting techniques. For more detailed explanations, please visit our How To Videos page where we are constantly adding new videos for your enjoyment.